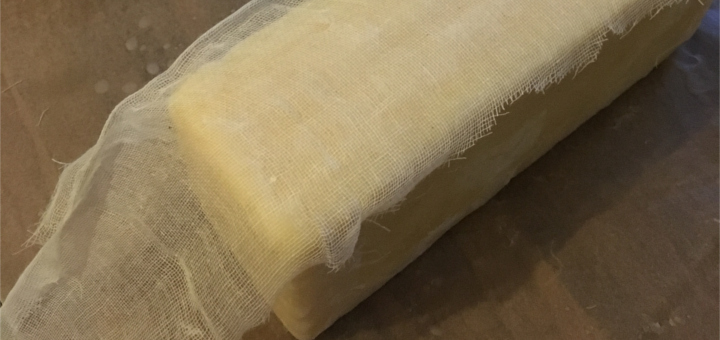
First Bandage-Wrapped Cheddar – The Unveiling

About four months ago, I was able to get to the local “milk station” to attain 20 liters of milk. From that milk, I made ricotta, mozzarella, and cheddar. Since that time, I have been aging that cheddar in my basement, where the temperature hovers around 52°F and the humidity stays steady at 50 percent. The molds already present in the basement were allowed to feast on any sugars (i.e., lactose) remaining in the cheese, but only if they were willing to impart flavor in the final product. I can unreservedly state this exchange was a success!
On September 3, 2017, I started with 15 liters of milk, a half teaspoon of (Omega) cultures, and three tablespoons (of really diluted) rennet. As I was using raw milk, there was no need to use calcium chloride, although I have plenty on hand. I did have some spats with my pH meter, but we did agree on some of the following measurements:
| Beginning | Rennet | Drain | Mill | Hoop | |
|---|---|---|---|---|---|
| By the Book | 6.6 | 6.4 | 5.9 | 5.3-5.5 | 5.2 |
| Observed | 6.75 | 6.56 | 6.41 | 5.43 | Unk. |
You may recall the the cheese form used was too large for the amount of cheese being produced (approximately two kilograms), so the final product did not have the tight knit of the curds that I had counted on. I had considered dropping the plans to bandage-wrapped the cheese and vacuum-pack it instead. However, no one I knew had a vacuum-sealer. So, I moved forward.
I had hoped that I could get enough melted lard into the cracks that I would save the cheese. For the most part I was right; however, there were still places, especially on the corners, where life found its way in and colored the cheese in bright reds and blacks – these I shaved off the final product. I would estimate that I only lost at most 5 percent of the cheese to discolored sections. As shown below, the final packaging did create a smooth exterior.
As mentioned above, I was able to lager my cheese in the basement of my apartment building. It is consistently cool there, and I do have a section of it accessible only to me. Note that I added no additional cultures to the milk that would produce these exterior molds (as you would in a brie, Camembert, or blue); rather, all of the molds seen on the exterior are those “native” to my basement. It was an amazing process to watch.
Above, in order, the cheese on the left is one month old, the cheese at the back is two months old, and the cheese at the back is four months old. I would regularly flip the cheese every-other-day and then weekly. I would pet, or brush down, the mold growth to both slow their progress and to spread the spores around the exterior. Although I did use plastic bags as makeshift gloves, I still found “fingerprints” in the cheese the following week where I must have pressed some spores into the exterior, and my thumbprint oval grew thereafter.
After four months, I cut open the cheddar made in early September. As this was my first cloth-bound cheddar, I was unsure the best way to remove the exterior. I could not find a nice edge to peel off the cheesecloth, so I went at it with a knife.
From these two halves, I was able to get a grip on the cloth and slowly remove the layers from the cheese. Almost all of the vibrant coloring came off with the cloth; however, there were spots of yellow and black that I still had to extricate with the knife. The locations of this discoloring were predictable given my knowledge of where the curds failed to knit well.
As this is a large amount of cheese, I immediately started to portion it out and deliver it to friends throughout the city. I now have even more room in my basement cheese cave; it’s time to get some more milk!


I have to admit that if I had known the outside color of the cheese before tasting, I’m not sure if I would have been brave enough…But I did check this cheddar out and have to say: It is delicious!
Sometimes you have to ask more questions. 🙂 Glad you enjoyed it!