5 Milk Purchasing Tactics for the Home Cheesemaker
For those of us not lucky enough to have farm-access to dairy, the best alternative for your cheesemaking efforts is the local grocery store. As you get ready for your make day, there are a 5 tips to keep in mind before setting out.
- Head to a store that has high milk turnover. The corner store may be convenient, but that milk may have been waiting for you for a week already. Remember, the fresher, the better. Be that person that checks all the ‘best by’ dates, especially those in the back; use the freshest milk possible. The best solution is get to know the dairy section manager – they can provide you insight on when the latest milk is arriving and may be able to set some aside for you.
- You will not succeed with ultrapasteurized milk. Check the label. Raw, unpasteurized milk is hard to find, so make sure your calcium chloride supply is sufficient in order to ensure firm curds. Recall that pasteurization is the heating of milk to specific temperatures for specific time periods with the goal of killing off harmful microorganisms (killing good ones is merely friendly fire).
- Cream-top milk is fantastic, but only if fresh. Cream-top is pasteurized, but unhomogenized milk. It takes only a day of unagitated rest for that cream-top to form, which means you’ll have a thick layer of heavy cream with a bunch of skim milk below. While remixing is possible, the idea of introducing air into your milk on cheese make day is never a good idea.
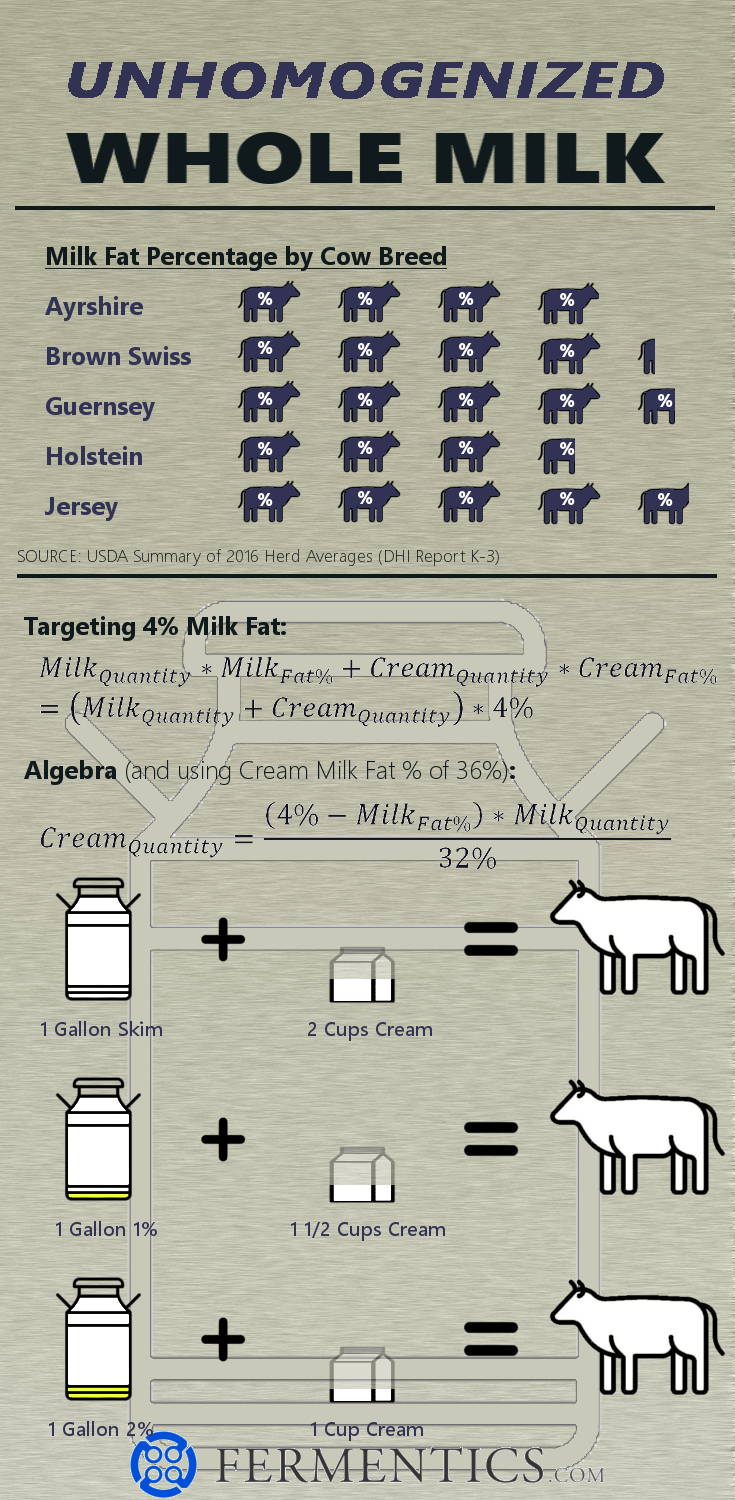
- If possible, buy unhomogenized milk. Recall that homogenization is the process of forcing the milk through progressively smaller screens to break up the fat globule into similar-sized chunks. In cheesemaking, you want to make full use of those globules. Cream-top milk is unhomogenized whole milk. You can make your own whole milk with lower-fat milk and some heavy cream; see below.
- Set your newly-purchased, refrigerated milk out for a couple hours. It is unwise to let milk sit out at room temperatures where cultures are active, but letting the milk slowly transition from refrigerated temperatures to the mid-50F will help to reduce the risk of scalding the milk while heating.
Pro-tip: take a small portion of milk (one-half cup per gallon used), bring it to initial culture temp (86°F for mesophilic and 92°F for thermophilic), and pitch your freeze-dried cultures. This will allow them a good amount of time to rehydrate, wake up, and start eating immediately when needed.


